Last Updated on April 27, 2026 by Lisa Keys
Let's bake a no jars sous vide chocolate cake. Are you ready for this sous vide dessert? It's going to blow your mind.
One of the most difficult things about baking is getting a consistent result from one kitchen to the next. Nothing illustrates this better than the baking competitions held at local and state fairs. I remember judging a cake contest sponsored by King Arthur Flour and was amazed how given the exact same recipe 50 cakes from 50 bakers could be so drastically different in taste, texture and appearance.
From one kitchen to the next and from one baker's technique to the next the variables are infinite. What if you could take the guesswork out of baking? What if we could eliminate improper measuring technique? How about eliminating the worry of oven hot spots or an oven that's too hot or too cool? And what if we could choose the exact baking temperature and time and have it never fail no matter the kitchen?
Best tips for making a sous vide chocolate cake
Say "Hello" to baking using weight measurements and the sous vide method of cooking. Now baking by weight is nothing new, but here in the old US of A some are slow to grasp the concept. In all it's creativity baking is still an exact science, so get on board with weighing ingredients for consistent results.
Lots of desserts are made with the sous vide method of cooking, but typically they are cooked in canning jars and not cake pans. The jars work great for creme brulee and other custard type preparations, but I have yet to eat a sous vide jar cake that I like. First, most of them take up to 3 hours to get fully cooked. Second, I find the dumpy, cylinder shape of a jar cake off-putting. To their creative credit, some bakers like to crumble the cake into modernist clumps for better appearance, but, well, that's just not a luscious layer cake in the way a cake is meant to be.
What you need
Now let's measure out all our ingredients and bake a no jars cake sous vide style (a time and temperature controlled water bath). In addition to your sous vide equipment, you will need:
- a 6-inch cake pan
- a 1-gallon Ziploc brand freezer bag (the only brand recommended for sous vide cooking)
- a set of at least 25 pound strength magnets
- a heat proof plate that is same diameter as your cake pan.
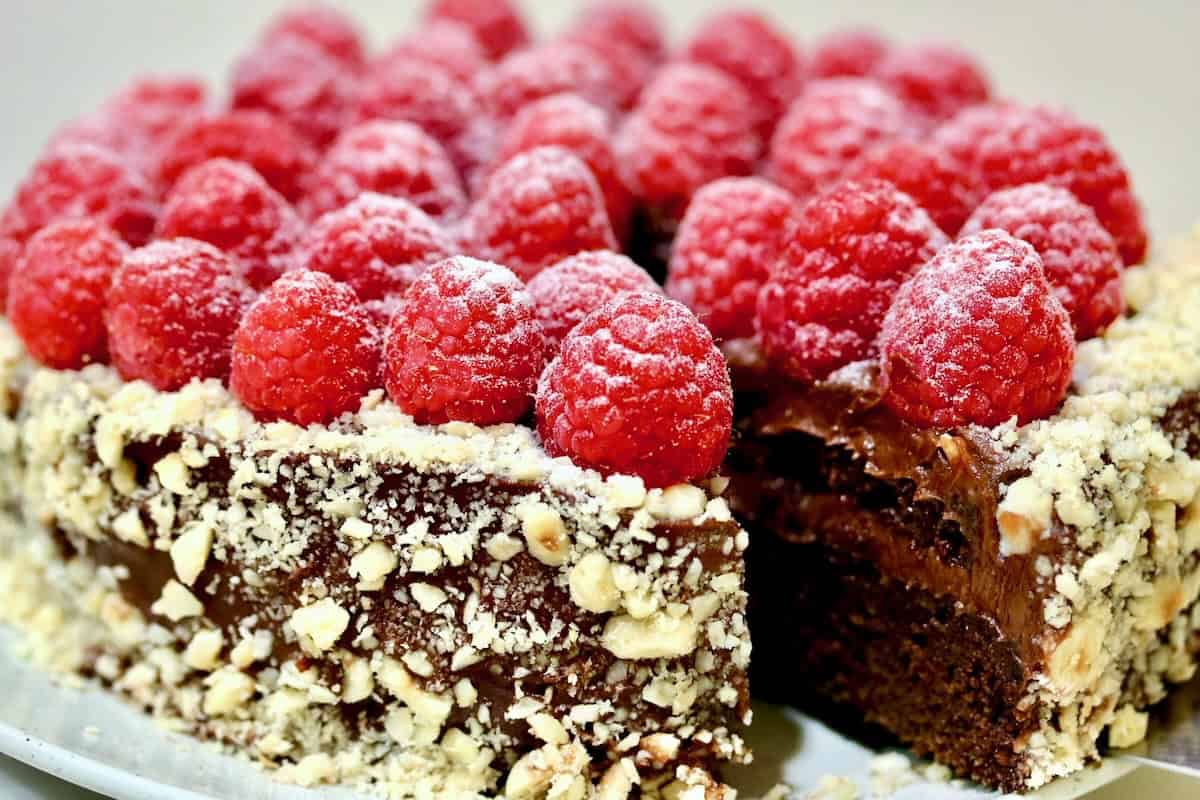
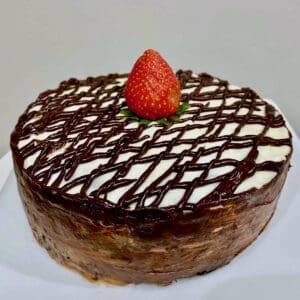
As far as the filling and frosting for this deliciously moist and full-flavored chocolate cake you can use what I suggest here or pick and choose your own favorites. I think my chocolate whipped cream or peanut butter filling and frosting would be fantastic, but simply dusted with powdered sugar and a dollop of whipped cream is just as good. Not a fan of chocolate? Than try my sous vide carrot cake.
Sous Vide Chocolate Cake
Ingredients
- 71 grams (½ cup) all-purpose flour
- 15 grams (2 ½ tablespoons) unsweetened cocoa powder
- ½ teaspoon baking soda
- ¼ teaspoon kosher salt
- 99 grams (½ cup packed) light brown sugar
- 1 egg
- ¼ cup strong black coffee
- ¼ cup buttermilk
- 3 tablespoons melted butter
- 1 teaspoon vanilla
- 1-2 cups Cream cheese frosting
- ½ cup diced fresh strawberries
- 3 tablespoons strawberry jam
- ¼ cup chocolate ganache
Instructions
- Set up your water bath and immersion circulator according to your equipment. Heat water bath to 198F and set cook time for 1 hour.
- Lightly coat a 6-inch round cake pan with non-stick spray. Line bottom of pan with parchment paper and spray with no-stick spray.
- In medium bowl, whisk flour, cocoa powder, baking soda and salt; set aside. In another bowl, whisk brown sugar and egg, about 30 seconds, making sure there are no lumps. Add coffee, buttermilk, butter and vanilla; whisk until well blended.
- Add flour mixture; gently whisk until dry ingredients are just moistened.
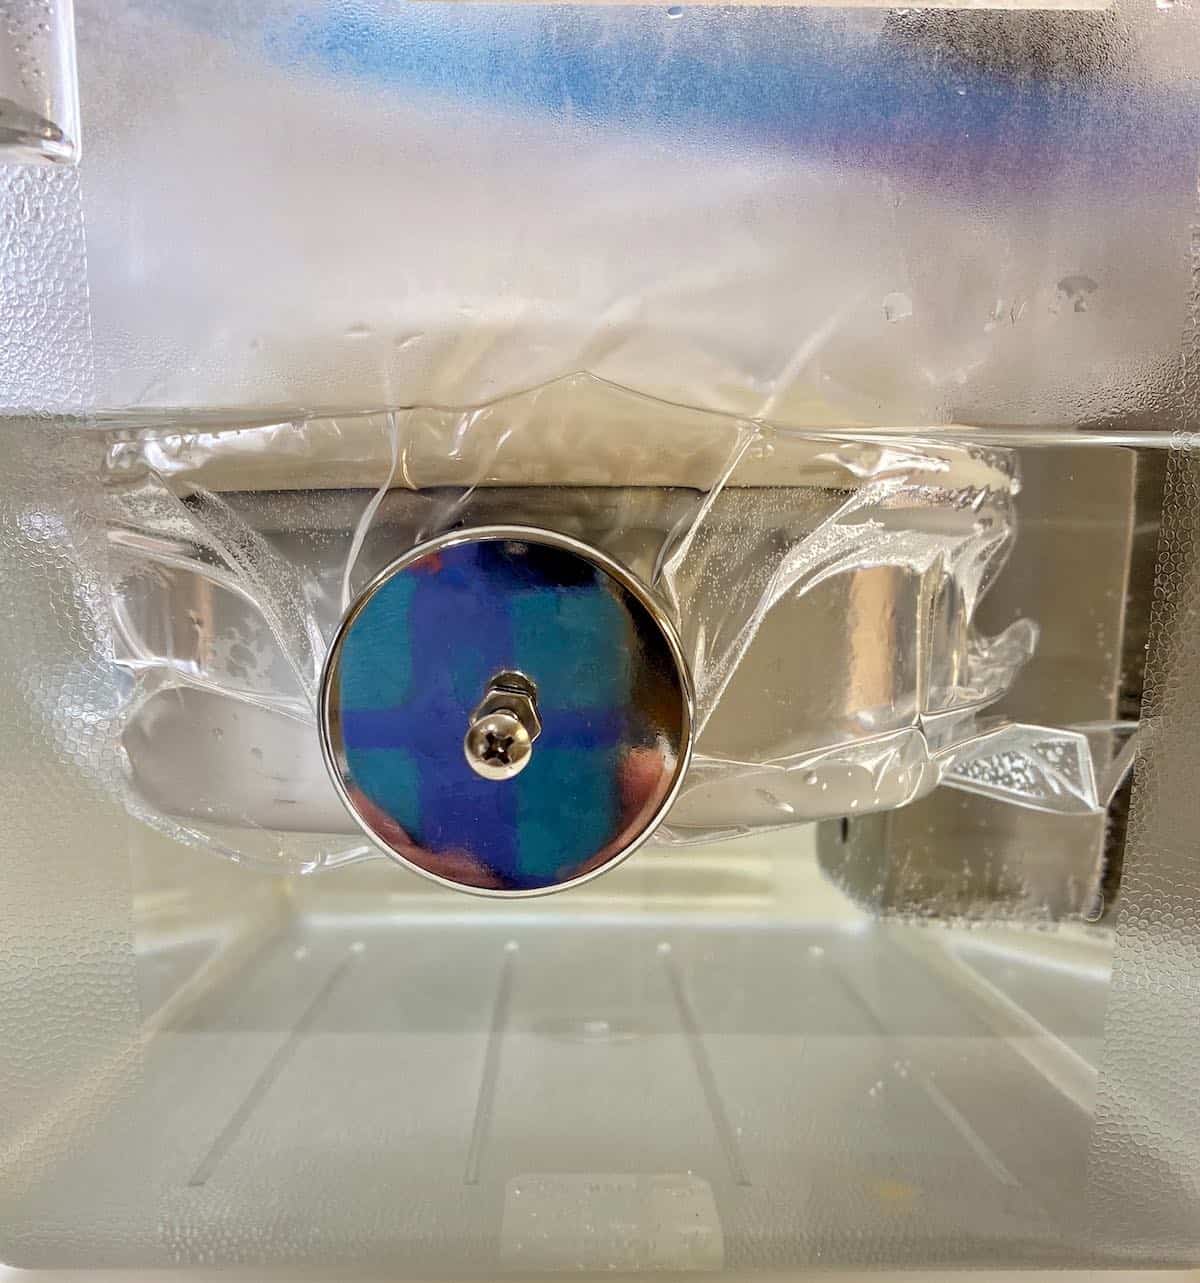
- Pour batter into pan. Insert pan into a 1-gallon Ziploc bag centering pan over bottom of bag. Add a magnet, facing out, from side of pan.
- Cover pan with a heat proof plate. Seal bag pushing out as much air as possible. Drop sealed cake into water bath attaching magnet to side of container making sure cake pan is submerged to its rim or slightly below water. Make slight adjustments, if needed, to be sure cake pan is level.
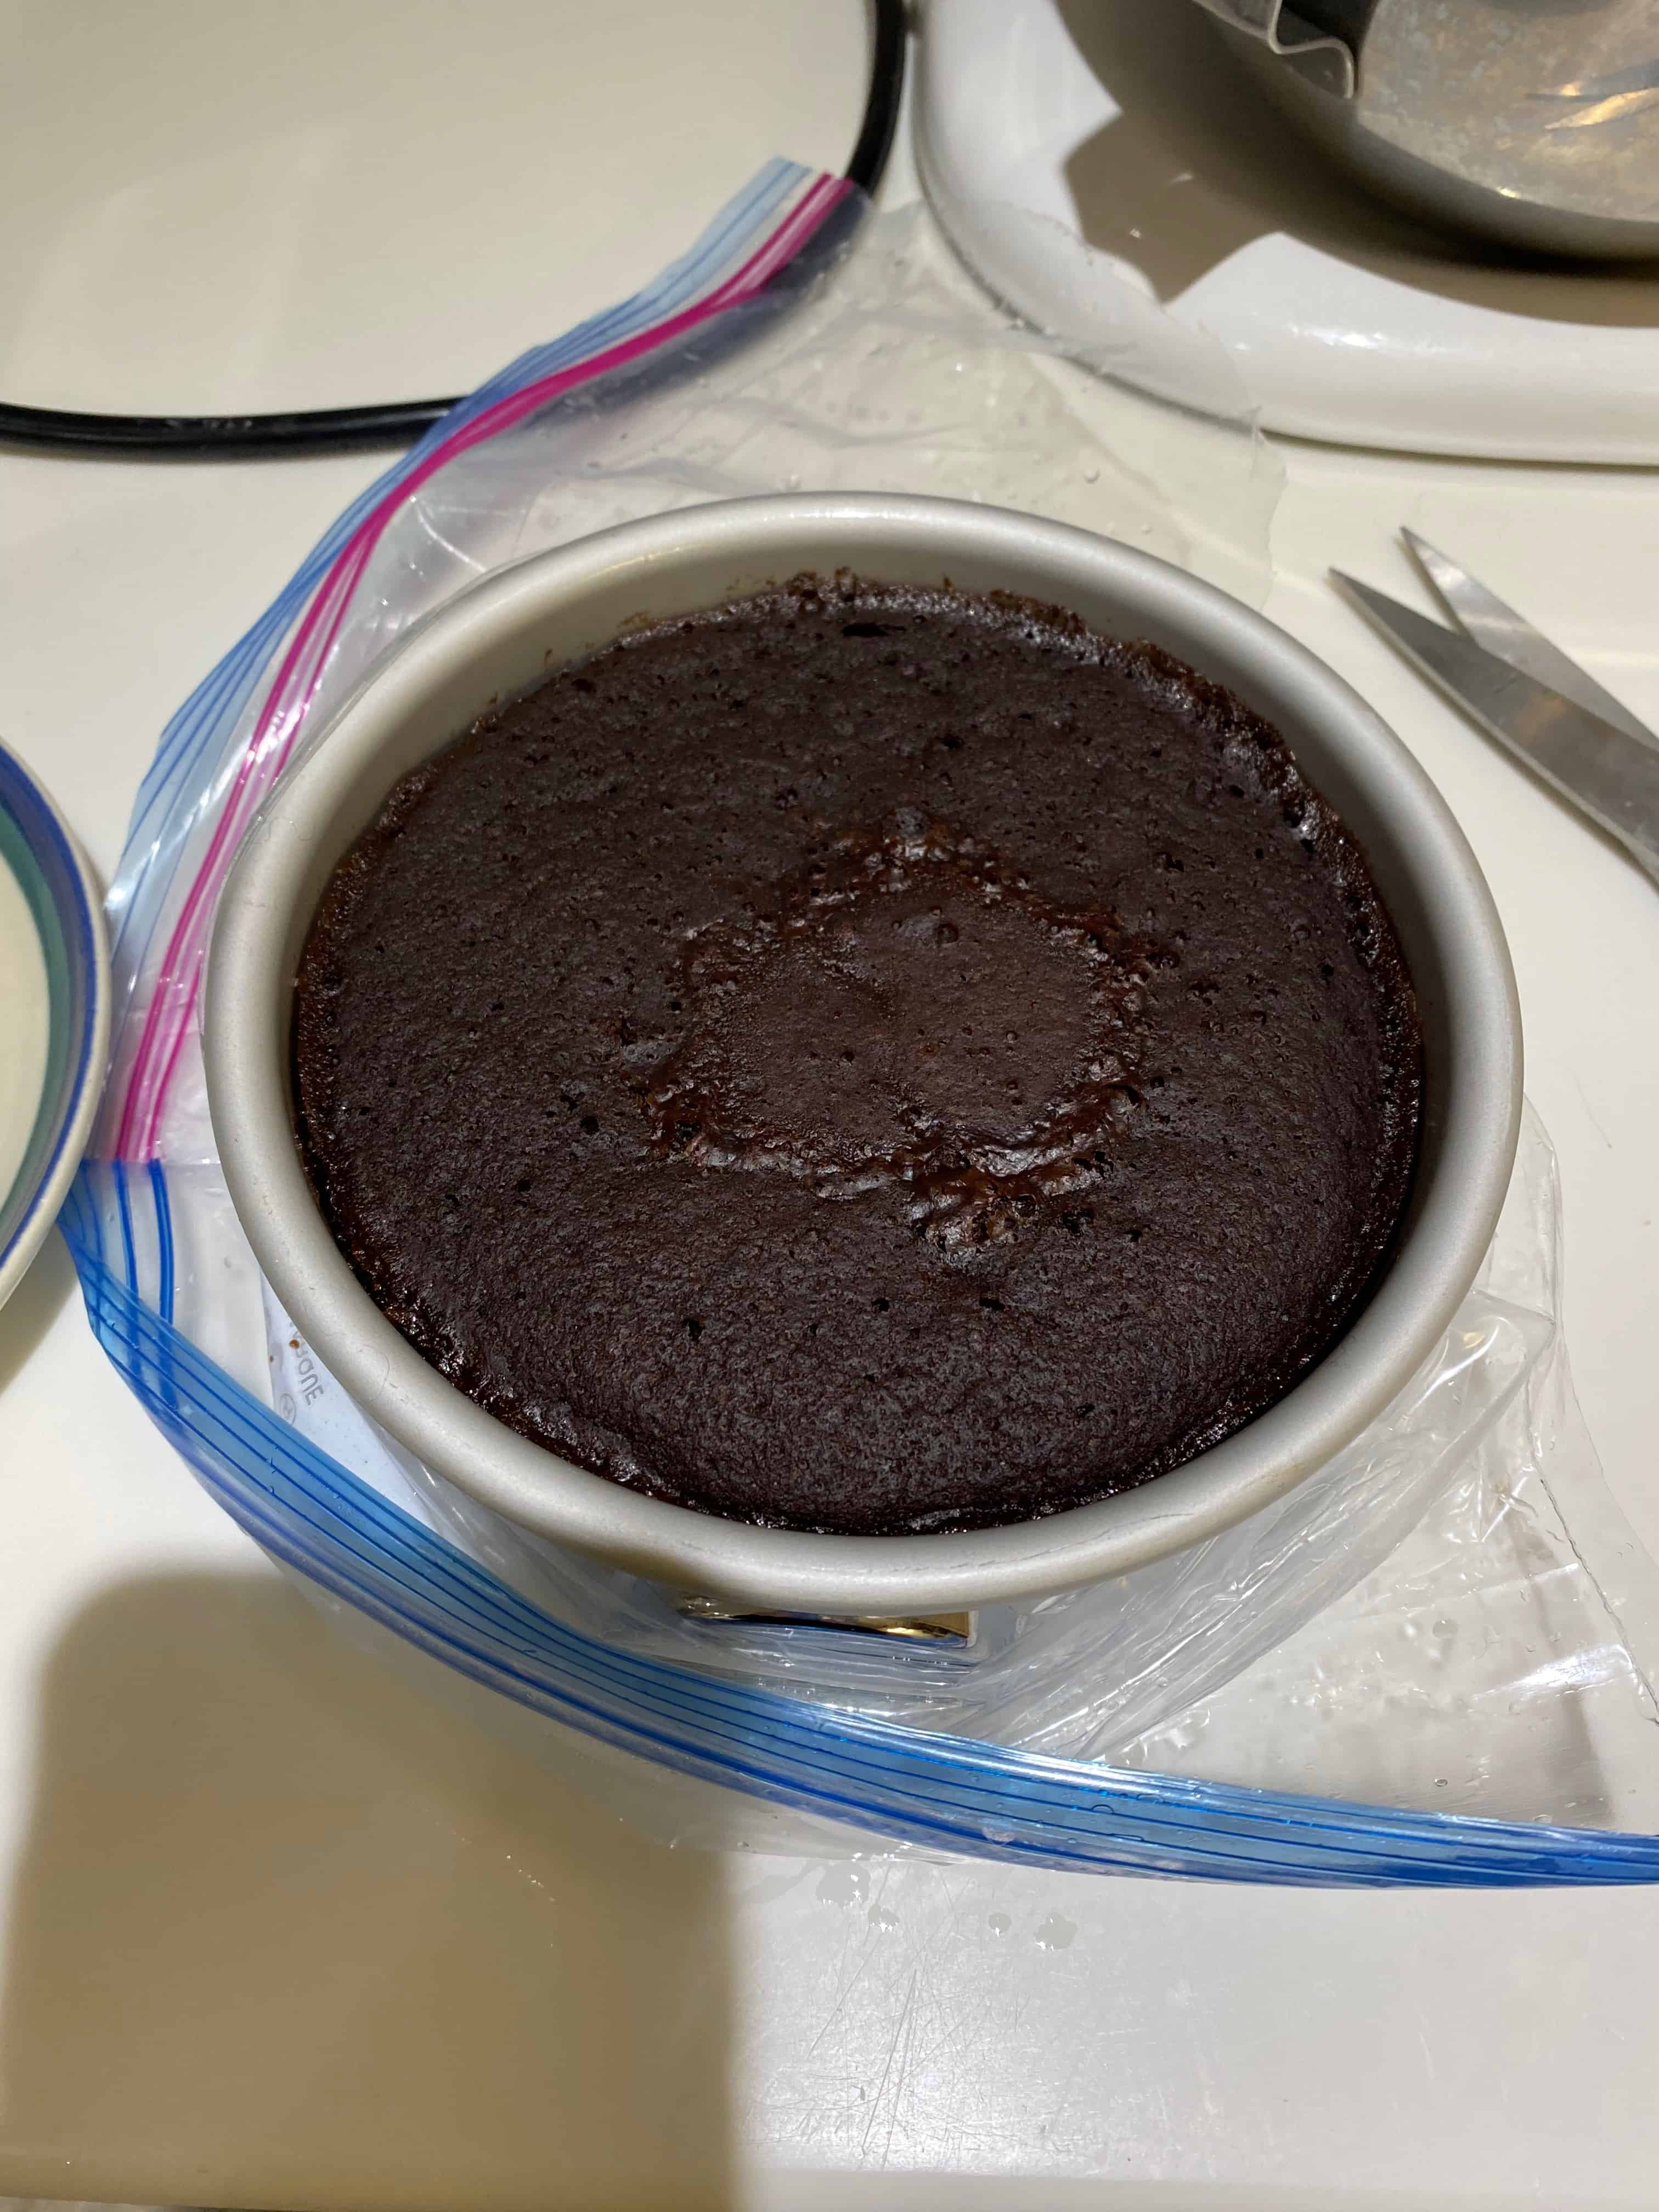
- Cook cake for 1 hour. Remove from water bath and open bag to let heat escape. Carefully remove cake from bag and remove plate.
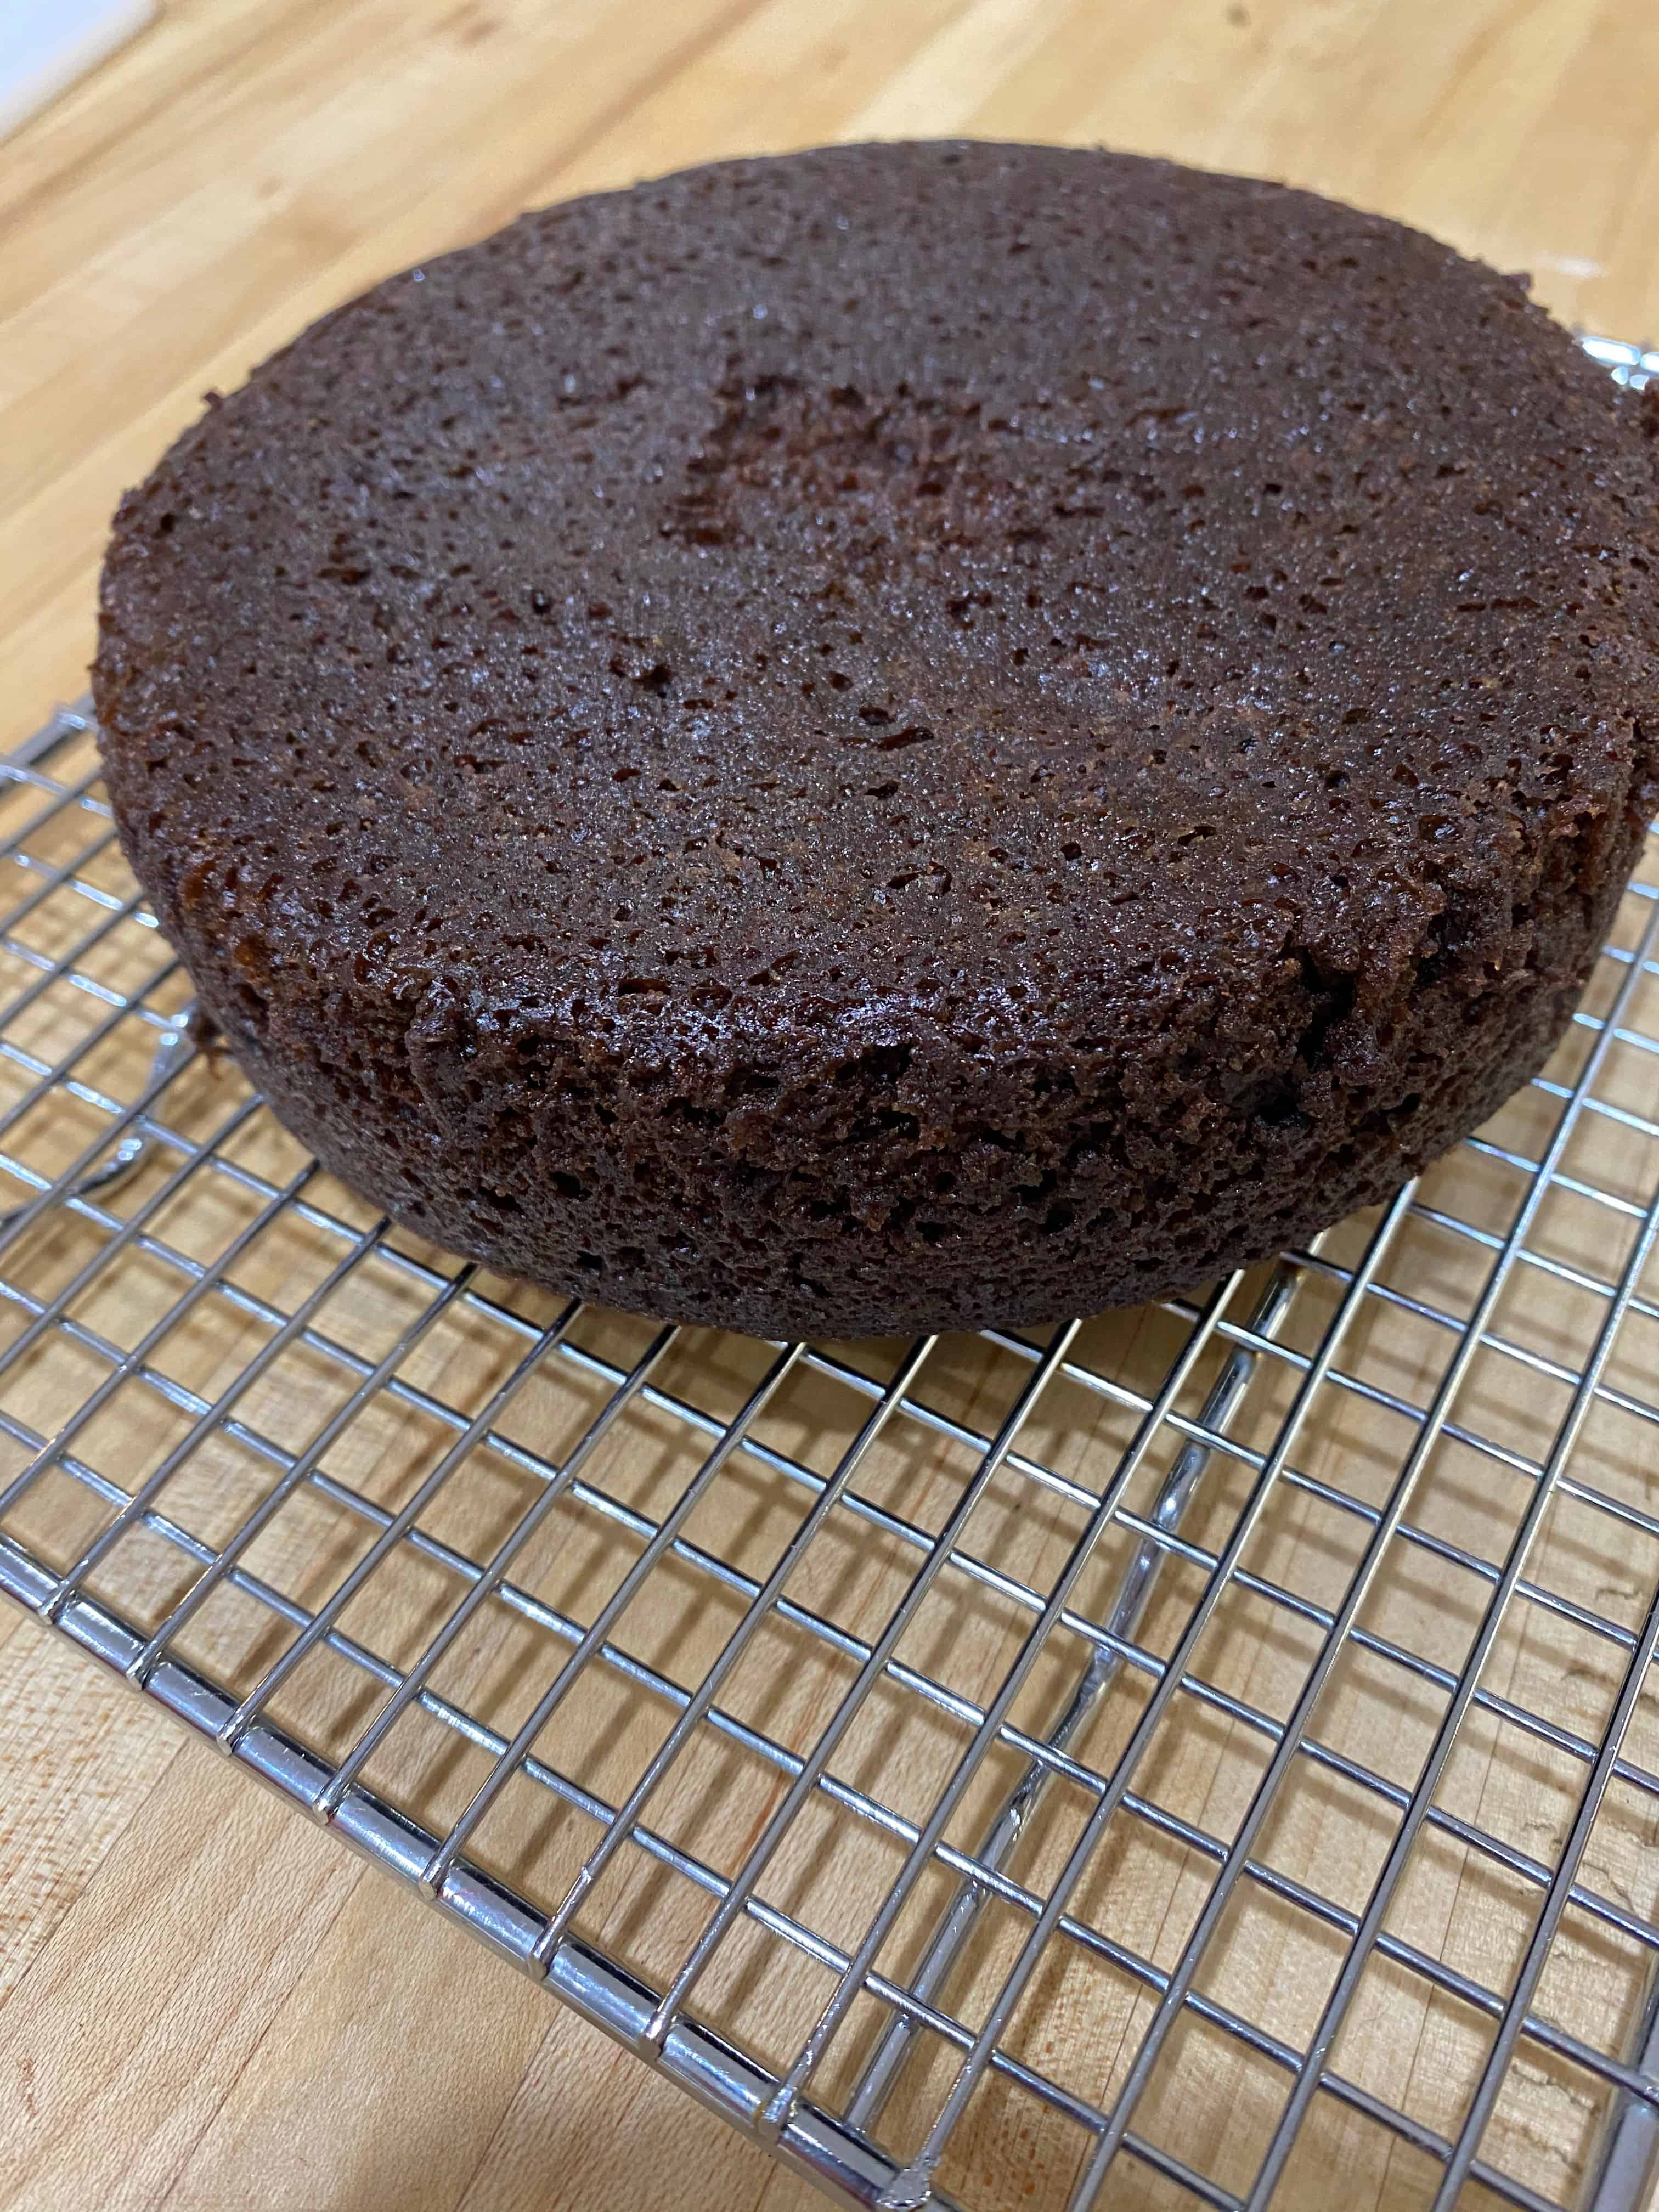
- Let cake cool in pan for 10 minutes. Run a thin knife around the edge and invert on to cooling rack. Remove parchment paper. Cool completely.
- Cake is delicious on its own served with whipped cream, but I like slicing it in half, horizontally, and turning it into a layer cake. I filled this one with a mix of fresh strawberries and jam and then frosted it with cream cheese frosting. I then swirled chocolate ganache (melted semisweet chocolate and heavy cream) through the frosting.
Video
Notes
Nutrition
You saw it here first and I couldn't be more excited! Now us bakers who also sous vide can consistently make the same cake from one kitchen to the next. Give it a try and let me know how it goes.


James Matino says
Very clever and likely to give extremely consistent, reproducible results. This sounds just like quantitative analysis lab I had in college. There must be something that could go wrong from time to time. Let me know if you ever have a problem.
Lisa says
Chemistry was always my favorite class in high school and college, so that shows here. Consistent, reproducible results is the goal. I have also created an almond berry cake and carrot cake, but I feel those need some slight tweaks in ingredients to be perfect.
thegsandwich says
🙂 This looks really good.
Lisa says
Thanks. It comes out perfect every time and the size is just right.
Carol Walsh says
We use our our sous vide quite a bit...(the chicken always comes out so juicy and tender). Would love to try this recipe, looks so good! I have a 7" pan I use for "instant pot cheesecake, but need to get the magnets to weigh it down. We'll see how it shakes out...I'll let you know. 🙂
Lisa says
I’d love to know more about how you cook your chicken sous vide. I am not sure how the 7-inch will work since it may need a little bigger ziplock and longer cooking time
Carol Walsh says
I like to use chicken tenders and just sprinkle them with whatever seasoning I want. Lemon pepper, teriyaki, curry, etc. I cryo-vac and label them and store in the freezer. Defrost before cooking. We had it last night, takes about 40 min. for 5-6 tenders. Easy-Peasy 🙂
Lisa says
Nothing could be easier and so delicious. Just a little preparation and dinner is ready to go. And if you forget to take them out of the freezer you can still just drop them in the sous vide and add a little extra cooking time.
Fred says
Hello,
What is the magnet for ?
Lisa says
The magnets are quite strong and heavy and are there to help keep the bag with the cake inside under the water and level. It's quite difficult to get all the air out of the bag sometimes with the water displacement method so the bag will naturally float.